...Return To Mine & Other Bonneville Car Construction Pages
.Previous Page...............B'ville Car Index Page.........................Next Page
.........................................-- Chute Doors Part V --
................................-- Video of Door Operation ( HERE )
.................. .
.
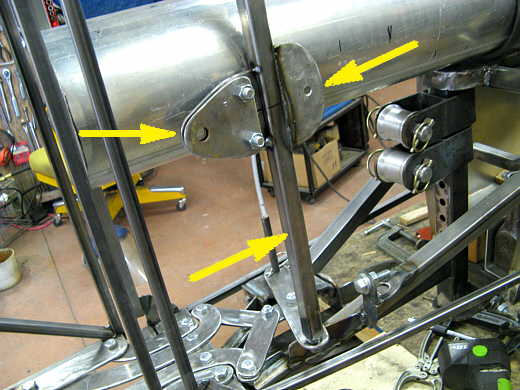
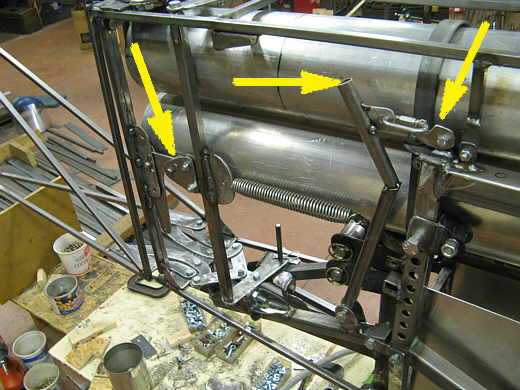
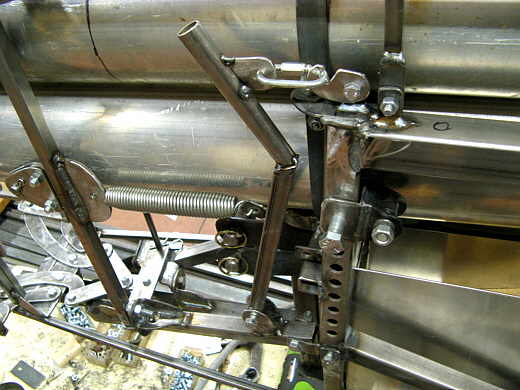
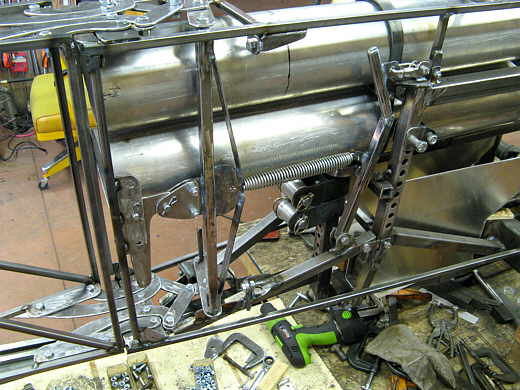
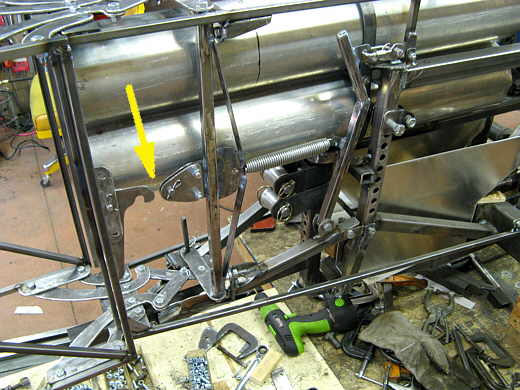
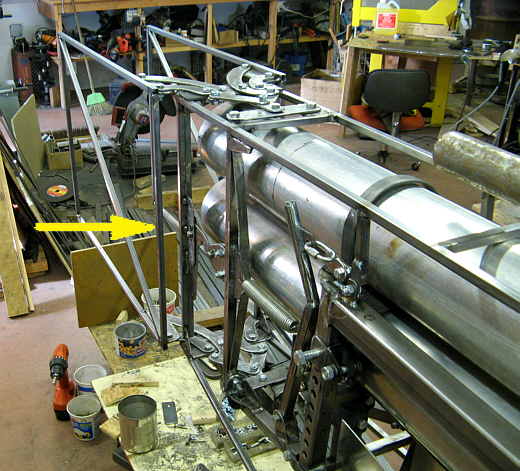
The lower middle arrow points to the vertical bar that pulls on the hinge assemblies on the top and bottom of the car. I welded a tab in the middle to the right side (right arrow) for the spring to attach to that will pull on all of this. The left arrow points to a tab welded to the vertical bar and to two plates with a hole in it. One of the pins I made will go into the hole and the latch will catch that pin..
.................. .
.
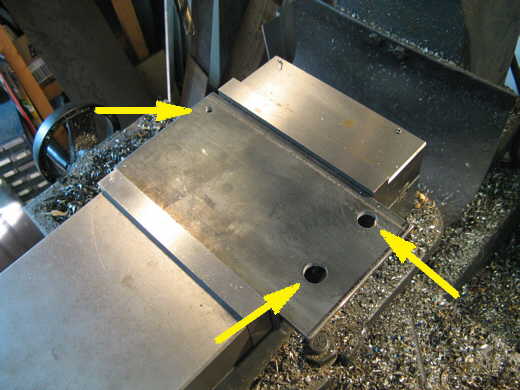
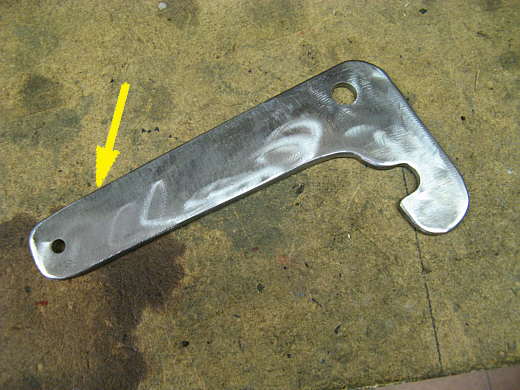
The latch was made from a piece of 3/16 X 4 inch strap. The top hole points to a hole where the lever will be pulled on. The large right hole to the right will be the pivot point and the other larger hole to the left will be cut into a slot to grab the pin on the vertical control bar.
.................... .
.
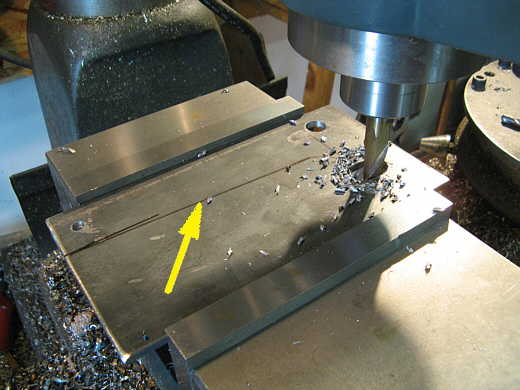
The arrow points to the final shape of the lever and the slot is being milled into it here. I drill all my holes in pieces while I can still hold them in the vise before I cut them to shape with..................
................... .
.
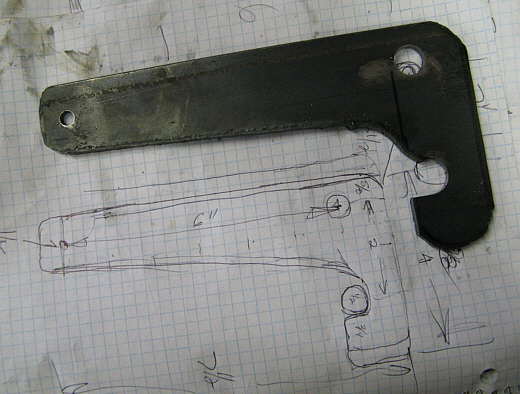
..................... the plasma cutter as shown in this picture. You can also see the quick sketch I did while sitting next to the car where I could get measurements for this piece. I don't try and design everything at once. I try to visualize it in my head and make one part and then go off of that part to make the next part or assembly. If I tried to do it all on paper at once it would be too overwhelming for me.
..................... .
.
The final piece after I cleaned it up with the grinder and with a 50 grit disc in a right angle die grinder. The arrow points to an area that will later be narrowed up a little.
..................... .
.
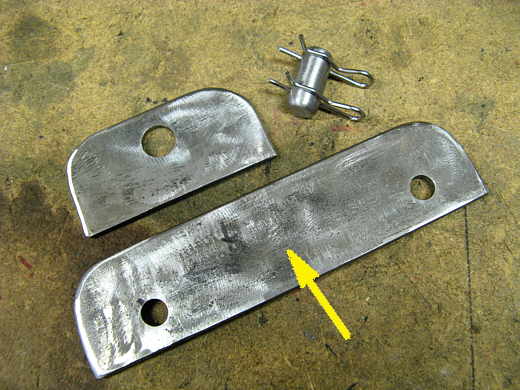
I needed more pivot pins for all of this and drilled some holes for the latch pins in the vise on the mill and then cut them to length and stuck them in the lathe for a second and .......................
.................. .
.
............... cleaned up the ends a little with a cutter and a file and shined them up a little with emery cloth and they end up looking like the one in the picture. I also made two brackets to hold one pin that the latch will pivot on. The arrow points to a bracket that looks like the one I made, but the one I made also had a center hole where the arrow is. I don't know how I mixed these up for this picture, but I did.
................... .
.
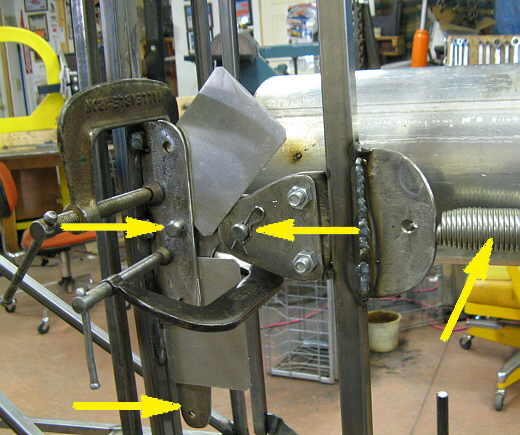
The right arrow points to the pull spring. The middle arrow points to the pin that the latch hooks on to hold the doors closed and the bottom left arrow points to the bottom of the latch. Above that I'm tacking the two brackets that the latch will pivot on in place. I put some .030 aluminum pieces in there to leave a little clearance for the latch.
................... .
.
Then a lever was made to pull the spring into position (middle arrow) and a simple hook was made (right arrow) to hold it there. In the picture the doors are closed and the latch (left arrow) is latched and the spring is pulled and locked. Everything is ready to trip the latch.
..................... .
.
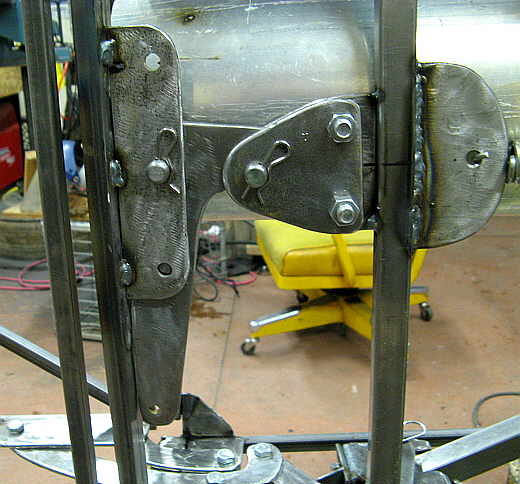
A close-up of the spring side and.........................
.................. .
.
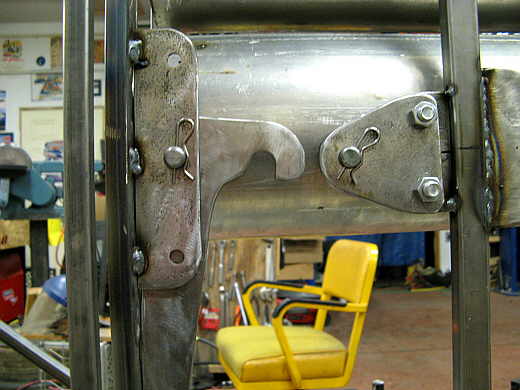
.................... a close-up of the latch side.
.................... .
.
Here the latch has been tripped and the spring has pulled the vertical bar to the right and opened the doors.
.................. .
.
I reinforced the vertical bar a little and finish welded the spring lever arm and domed a small piece of 20 gauge and welded it to the top of the arm to finish it off.
.................. .
.
The doors closed and the latch and spring set to fire.
.................. .
.
A close-up of the prior picture.
.................. .
.
The latch has opened and the spring has pulled ...........................
.................. .
.
......................... the doors open.
.................. .
.
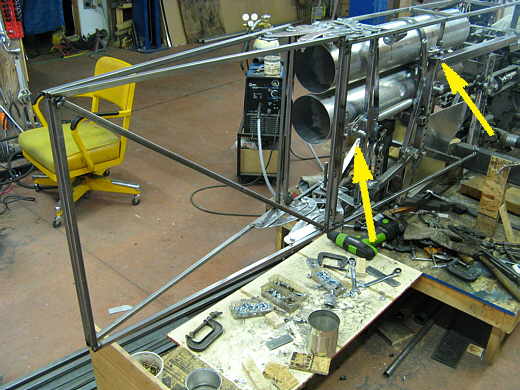
The doors open from behind the car and ........................
.................. .
.
......................... looking backwards. The arrow points to the 1 3/8 gap that opens up when the doors are open. It doesn't take much pull on the latch at all to fire the doors open. I plan on pulling on the latch with an electric solenoid fired with a push button and having a back-up pull cable.
I posted crude video on YouTube if you want to see this all in action. You can watch it ( HERE ). I would suggest not watching it at full screen as it isn't that good. I'll see if I can do a better one later.
I'm quite happy to say this all seems to work fine with the car not moving. The real test will be on the course.
................................-- Video of Door Operation ( HERE )
..............................................................Next Page